5/05/2011

Refined, Defined, but still slightly UnCivilized!


Now we get the party started! Take the whole mess apart, apply lots of paint remover, solvent, sandpaper, bondo, primer, more sandpaper, more bondo, more primer, glazing putty, lotsa paint, lotsa clear coat, WoooHoooo!
Tank from a 75 ct, front forks from same. Nice smooth black paint, taller bars, better headlight,speedo,grips. Santa Rosa style seat, forward pegs, custom cable kits, chrome shocks shortened for ride height. Down swept exhaust with fishtail. Leather bags for covers, and a custom plate and tail light bracket.
What better place to put all those pesky wires, getting the braided stainless steel covering into that hole around the wires was kinda fun, but well worth the effort!
I drilled a 1/2 hole on the left side front lower body, right above the motor and enlarged the original hole on the right so i could run the coil wire thru one and both fuel lines thru other.I modified the battery cover several times trying to find the "look", never did,,I always wanted some kinda place to stash stuff, tools, parts, papers, maby a beer, started looking for some kinda soft bag, and just thru the size I needed I found out lots of fork bags where that size!!

Lots of body work here, ground down welds, fixed the bad ones, reinforced, blended, smoothed, and some of it you may never see! It really needed foot pegs alittle further forward, not easy on this kinda frame! We tryed to think of way without attaching to the tubes! Back to reality, gotta attach to the tube, this is the fastest, easiest,,hardly any fab work way to do it,,re attach the stock skid plate and weld foot pegs to it! And it looks great! look the angle of the rear shocks and the front down tubes on the chrome skid plate match! All I had to do was fab out a small plate with 2 holes to match the 75ct skid plate holes (68ct skid plate attaches vertical and the 75 horizontally) and weld it to the bottom of the lower tube, it was pure luck that the exhaust pipe cleared the skid plate! I used the old mount for the spring bracket on the now missing center stand for the muffler mount. The fishtail is from a Harley aftermarket tip, I just cut off the fin and about 1/8 of the of the pipe where it attached to the pipe and just spot welded it on top of the muffler. Looks lots better like this,,not what I imagined, but good for now. I don't think I will ever really be "done" with this project, I may abandon further improvements!


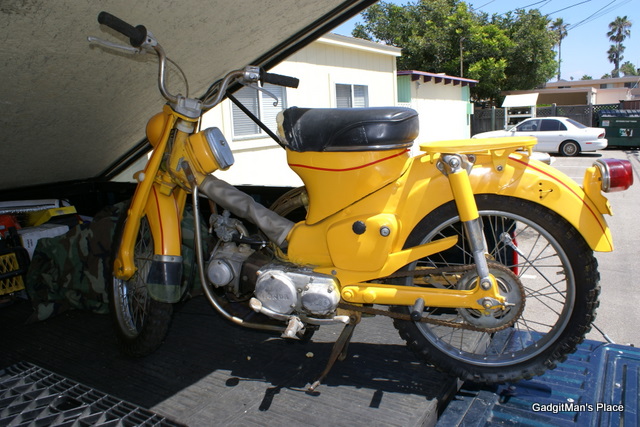
I know running without a front fender is hard on frame paint and anything else this sandy pavement will throw up on the bike, but that old, fat, British tire looks nice hangin way out there all naked! The 2inch chrome speedo and mount worked out well using a universal mirror mount to stick it to the bars. Nice visored chrome headlight with a standard H4 bulb, I found a H4 6V 35/35 watt on eBay for like 8 bucks!
Up top here you can see the cut down seat springs, because I changed tanks and welded the neck on lower, the angle was low in the front. Making the seat a good angel ended up with almost no springs! Had to leave them on there no matter how short, cause it was getting awfully black back there. Only 1 1/8 rear travel. I now have to really watch for potholes, dips, speed bumps, and ANY puddles! This is not a bike for riding in the rain.

The 1st working prototype


Notice that its still mostly 1968 parts, and still has stock muffler. The seat really started looking too tall, so I rebuilt it with new shorter foam, still looked too high and now it makes my butt sore!

Rough, Ratty and Ready To Roll! Tagged, titled, and insured . Now a street legal bike! Handle bars are actually for a bicycle, headlight bucket is a repro plastic unit for a 65 Honda s90 with the original speedo for the 68ct stuck in with a toggle switch for the headlight with orange high temp silicon gasket maker! Hey its what I had layin around.The tail light is a old plain round trailer universal unit that I drilled holes in the bottom towards the tag for night tag illumination. Exhaust is 1 1/2 O.D. out of head to 1 3/4  rear part with a turn down that has a very acute cutoff, really liked the way the tip turned out! It proved to be a bit obnoxious, sounded ok,,but a bit loud, so i cut of the larger pipe and made a 2 stage internal muffler baffle out of 1 in pipe drilled fulla 1/2 in holes plugged half way. One day the end of the kick starter snapped off at the swivel, so i welded a large short bolt to the end, more rat style.We painted the wheel hubs black one day, really looked better, the originals where discolored and pitted. The rear of the fender was just pounded until it was 90 strait up then trimmed to about 1/2 in, this is where I welded all the rear seams and re profiled the rear fender,,to match the arch of the now farther back wheel, that took 3 trys to get right! Again if i would have just cut a template out and layed  over and used it as a guide it would have been right the 1st time! But that would have ruined the whole feng schwa thang!
I had a copper bar laying around, made a nice light and tag bracket. Wrench in swing arm stands out nice.
Now that I know it will work,and I can get it legal, it will get refined!

5/04/2011

Destruction to Construction

This is the point in, retrospect,i should have made it run good and sell it and buy a frame and title and go! Just a parts bike or 2 and eBay your set! Most all the stuff I didn't make myself, came from eBay! I pretty much destroyed a perfectly serviceable classic Honda. To me I took a ordinary, old, trail bike and made it to my liking, the way I thought would look cool. I will have to say my buddy Todd did help lots to keep it real and laugh at some of my ideas Here is the 1st mod, a painfull one for most! Cut off frame tube at body weld.
Cut neck off above air filter hole.Get busy with grinder.Cut hole in body,weld 2 new tubes!
Fish mouth the 2 tubes in line with your rake angel , if not right a little grinding changes alot!
This is a good point to check ride height! And body angle, you can change it with tire and or wheel and tire size. Just measure some different bikes and get idea how big of a rim you want and what size tire. I ended up with a few different ones before finding the 'one'.
My buddy Todd said it "looks like a dirt bike" with the swing arm this long. I thought it looked great! But I was afraid it might prove unstable...but now I think it might work fine.in this picture it is not being held up by anything! it is that low, if I was going to just show it, it would have stayed this way,,maby the next one,,,
I put in slightly smaller than the stock size frame tubes that are about 5 and 3/4  inches longer than stock. Rake was done by the much more Traditional American Style of Fabrication, or more like,,,nope,,needs more ,,little more,,,,ya! kinda way the whole thing was made, and remade,,, almost all of this bike was done by eye, no pesky measuring,no square, kinda like dead reckoning! I think that's what made it so fun! no beating myself up about every thing being perfect to the 100th of a inch. as long as it tracks straight, tires are in the middle of the fenders and stops straight I could friggin care less! I dought it will ever hit 50mph, or be ridden more that 20 minutes at a time, I think it will work out ok. It's always the details that gets some projects shelved or slow to finish. Brake rods you need to make,like cable kits that you can now buy online and make your own! It was at this point in the construction Todd and I would be riding it around the block testing stuff, playin really, that people started asking " what the hell is that?"
I took the original yellow plastic covers off the rear shocks, and now there really squeaky! I like the way the front end looks, but, it drives like crap. It needs all new bushings in the bottom pivot, hard to justify the work cause I know I would do it all, springs and,shocks , convert neck to caged bearings,,,sigh,,,,,I think it will be worth it,why not?  We have gone this far.

1968 Honda Trail 90 chopper project

This is how it started, a free Trail Bike. Bone stock and original running condition. I had been following Chalopy.blogspot.com/ for a few weeks and it felt like destiny knocking. You really need to check out Ralph's blog, very nice and he spells much better than me! Tod my buddy next door really helped with sanding, painting, and talking me outta bad ideas! Some of the bikes I was seeing on Chalopyblog then and now are works of art, not built to ride, but still hugely creative! Most of the customs of the Asian style are meant to ride, some barley, but are still used and driven at rallies and shows. I will be trying to get mine into a few local shows and test the reactions, and see if i can get it in, American culture is not very supportive of adults riding small displacement motorcycles, I hope to help change that, what with lots of folks wanting to be more "green" and thinking there carbon footprint needs to be smaller. I have been involved in building , customizing, repairing and maintaining just about anything that spews hydrocarbons and I will say that this little Honda project has been, and still is, a blast!